Create and edit semantic artefacts
VocBench is a service that enables the creation, editing and publishing of semantic artefacts. To create a new project or edit an existing project in VocBench there are two options:
Not registered users must register to VocBench at the following link(Figure 29). Within the registration form, it is possible to request editing permission of a semantic artefact published in EcoPortal by adding the full resource name and acronym (e.g., Fish Traits Thesaurus (FISHTRAITS)) into the box “Existing semantic artefact?”. By default, the last version on EcoPortal is loaded, otherwise users have to specify the version from which to start editing in VocBench. NOTE: Only the semantic artefact owner can request editing permission of that resource.
To create a new semantic artefact users must specify:
- New semantic artefact: the name of the project, e.g., Fish Traits Thesaurus. It is recommended to add the full name of the resource that will appear in EcoPortal;
- BaseURI: the URL necessary for the creation of a project. NOTE: if users do not have a BaseURI, the system will provide the following:
- https://kos.lifewatch.eu/ontologies/yourACRONYM for ontologies;
- https://kos.lifewatch.eu/thesauri/yourACRONYM for thesauri, glossaries or other loose sets of concepts.
- Model: the model of the new project which can be OWL or SKOS. NOTE: To understand more about the SKOS model in EcoPortal it is recommended to read the following section.
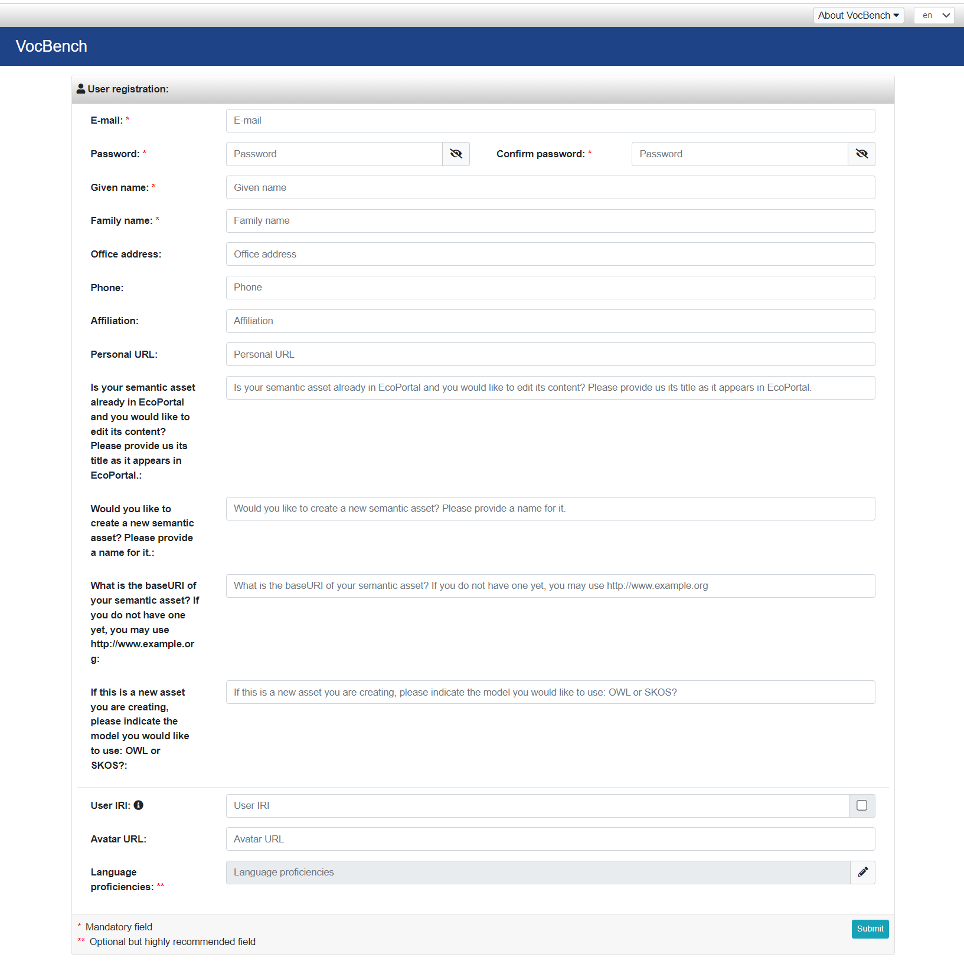
Figure 29: Registration in VocBench and creation of a new semantic artefact
Registered users can contact the Administrators at this email address semantics@lifewatch.eu, specifying:
- name of the new semantic artefact
- Base URI (check the previous paragraph for more specific information)
- Model (e.g. OWL, SKOS, RDFS, OntoLex, EDOAL)
- Lexicalization (e.g. RDFS, SKOS, SKOS-XL, OntoLex)
- specify which among history, validation, blacklisting, undo, trivial inference to have
- repository access (e.g. create a local project or a remote one),
- configuration (e.g. native store, in memory, GraphDB) The request is then managed by the administrator that will create the new project and assign the role of Project Manager to the creator.
In the list of projects, there should be a new item for the project as shown in Figure 30, with information related to name, model and lexicalization of the resource. It is indicated whether history and validation have been activated in the project. Lastly, the repository location is specified (e.g. local or remote).

Figure 30: List of projects in VocBench
All subsequent steps require moving to the “Data” tab to edit the semantic artefact. In the “Scheme” tab (Figure 31), click on the create button to create a new skos:ConceptScheme ( []* ).

Figure 31: Scheme tab of the project in VocBench
In the scheme creation dialog (Figure 32), specify the label of the concept scheme e.g., “continents” in English and then click on the Ok button.
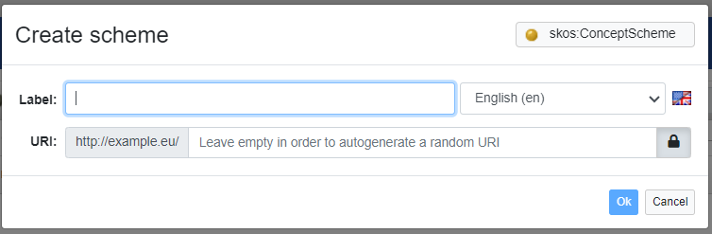
Figure 32: Creation of a concept scheme in VocBench
Then, select the newly created scheme as in Figure 32.
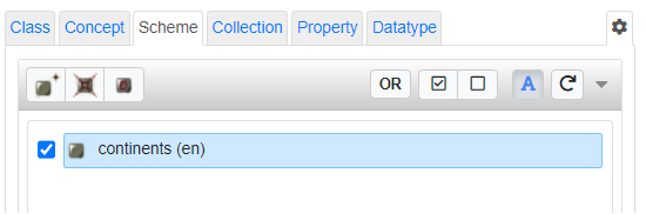
Figure 33: Selection of a newly created scheme in VocBench
In the Concept tab (Figure 34), click on the create button to create a new skos:Concept ( ()* ).

Figure 34: Concept tab of the project in VocBench
In the concept creation dialog (Figure 35), specify the label of the concept e.g., “Africa” in English and then click on the Ok button. This label represents the skos:prefLabel of the concept.
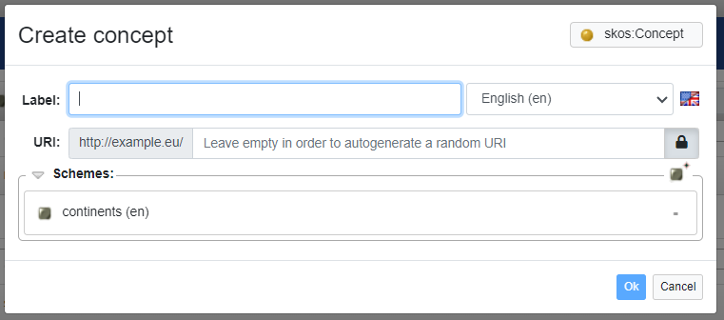
Figure 35: Creation of a new concept in VocBench
Do the same to create other concepts:
- America
- Asia
- Europe
- Oceania
- Antarctica
The concept tree generated should contain a flat list of the five continents (Figure 36). It should be noted that the list of concepts generated is visualised in alphabetical order.

Figure 36: The concept tree in VocBench
To add hierarchical depth to the structure, in the concept tab (Figure 37) select one continent and click on “Create narrow concept” button ( ()* ).
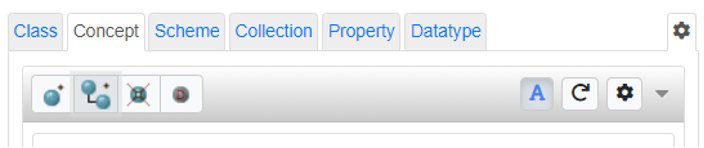
Figure 37: Create narrow concept
In the creation dialog (Figure 38), specify the label for the narrow concept e.g., “Italy” in English and then click on the Ok button.

Figure 38: Wizard for the creation of narrower concept
To understand in detail the different aspects of the user experience on VocBench, we recommend reading the following User Manual.
Import an excel into VocBench
VocBench uses the platform Sheet2RDF to generate RDF triples from datasheets. Sheet2RDF can be accessed by clicking on the Tool tab of the VocBench menu and selecting the Sheet2RDF entry.
To use the Sheet2RDF tool correctly, it is essential to compile with the correct formatting whereby each datasheet column represents a SKOS/OWL property. An illustrative example of a valid file format is provided here. For a comprehensive understanding of the user interface and the diverse functionalities of the tool, please consult this resource. The following example provides details about the SKOS concepts creation when using Sheet2RDF.
Example: After uploading the Excel file using the “Browse” button, select “Subject mapping” in red (see Figure 39). Users are then required to:
- Select the header that is going to be your Subject;
- Select on the “Assert type” check box;
- Click on the yellow circle and select “Concept”;
- In the “Converter” tab below, select “DefaultConverter”;
- In “Additional predicate-object” tab, click on the “plus” button on the side;
- Add the Predicate by selecting the SKOS property “inScheme”;
- Then select the Object by clicking on “Concept Scheme” and then on the desired scheme;
- Then click “OK”.
Note: the Concept Scheme has to be created before uploading the SKOS concepts.
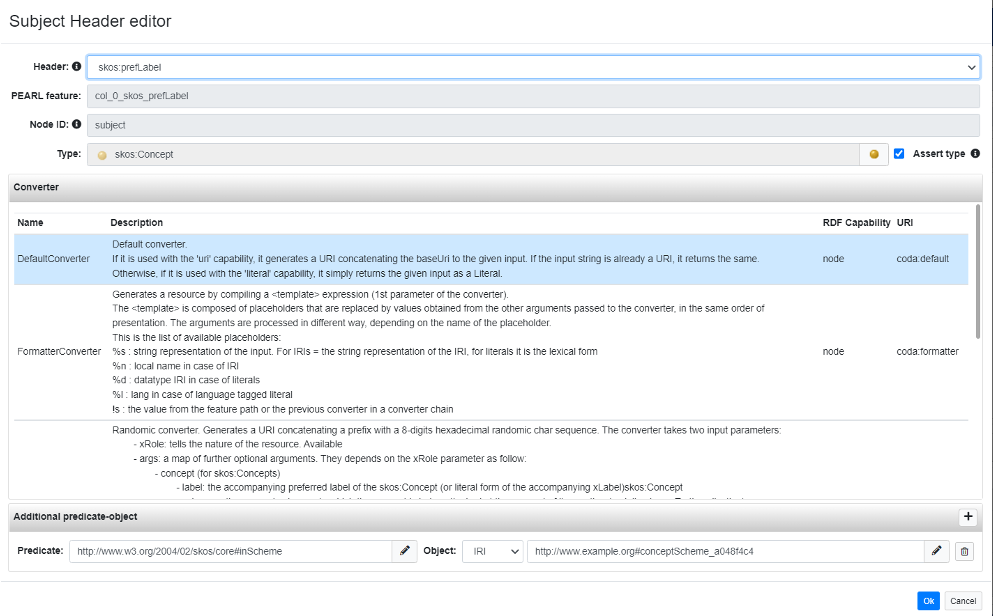
Figure 39: Subject header editor
Upon executing these tasks, all headers should be highlighted in green (Figure 40).
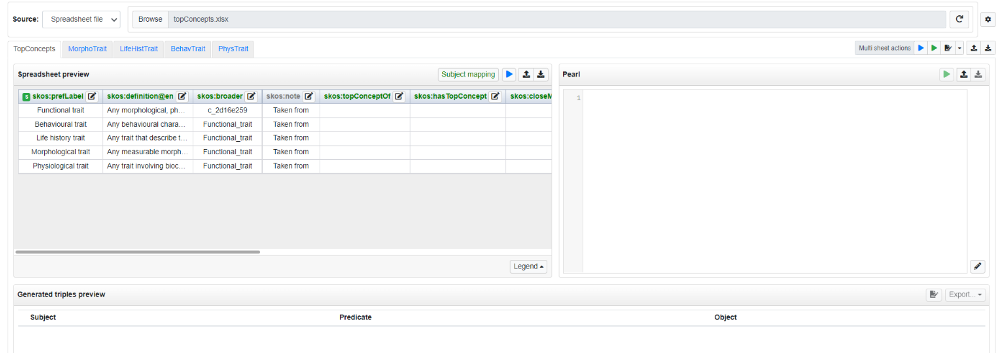
Figure 40: Sheet2RDF tool
If a header appears in yellow or black, by clicking on the pencil icon next to the header users have the possibility to either manually map the SKOS/OWL property or ignore the header. Following this, the blue “play” button and the subsequent green one should be clicked to generate the PURL code and triples. After the triples are generated, navigating to the “Generated triples preview” tab allows users to click on the “Add triples” button, presenting all the information in the “Data” section.